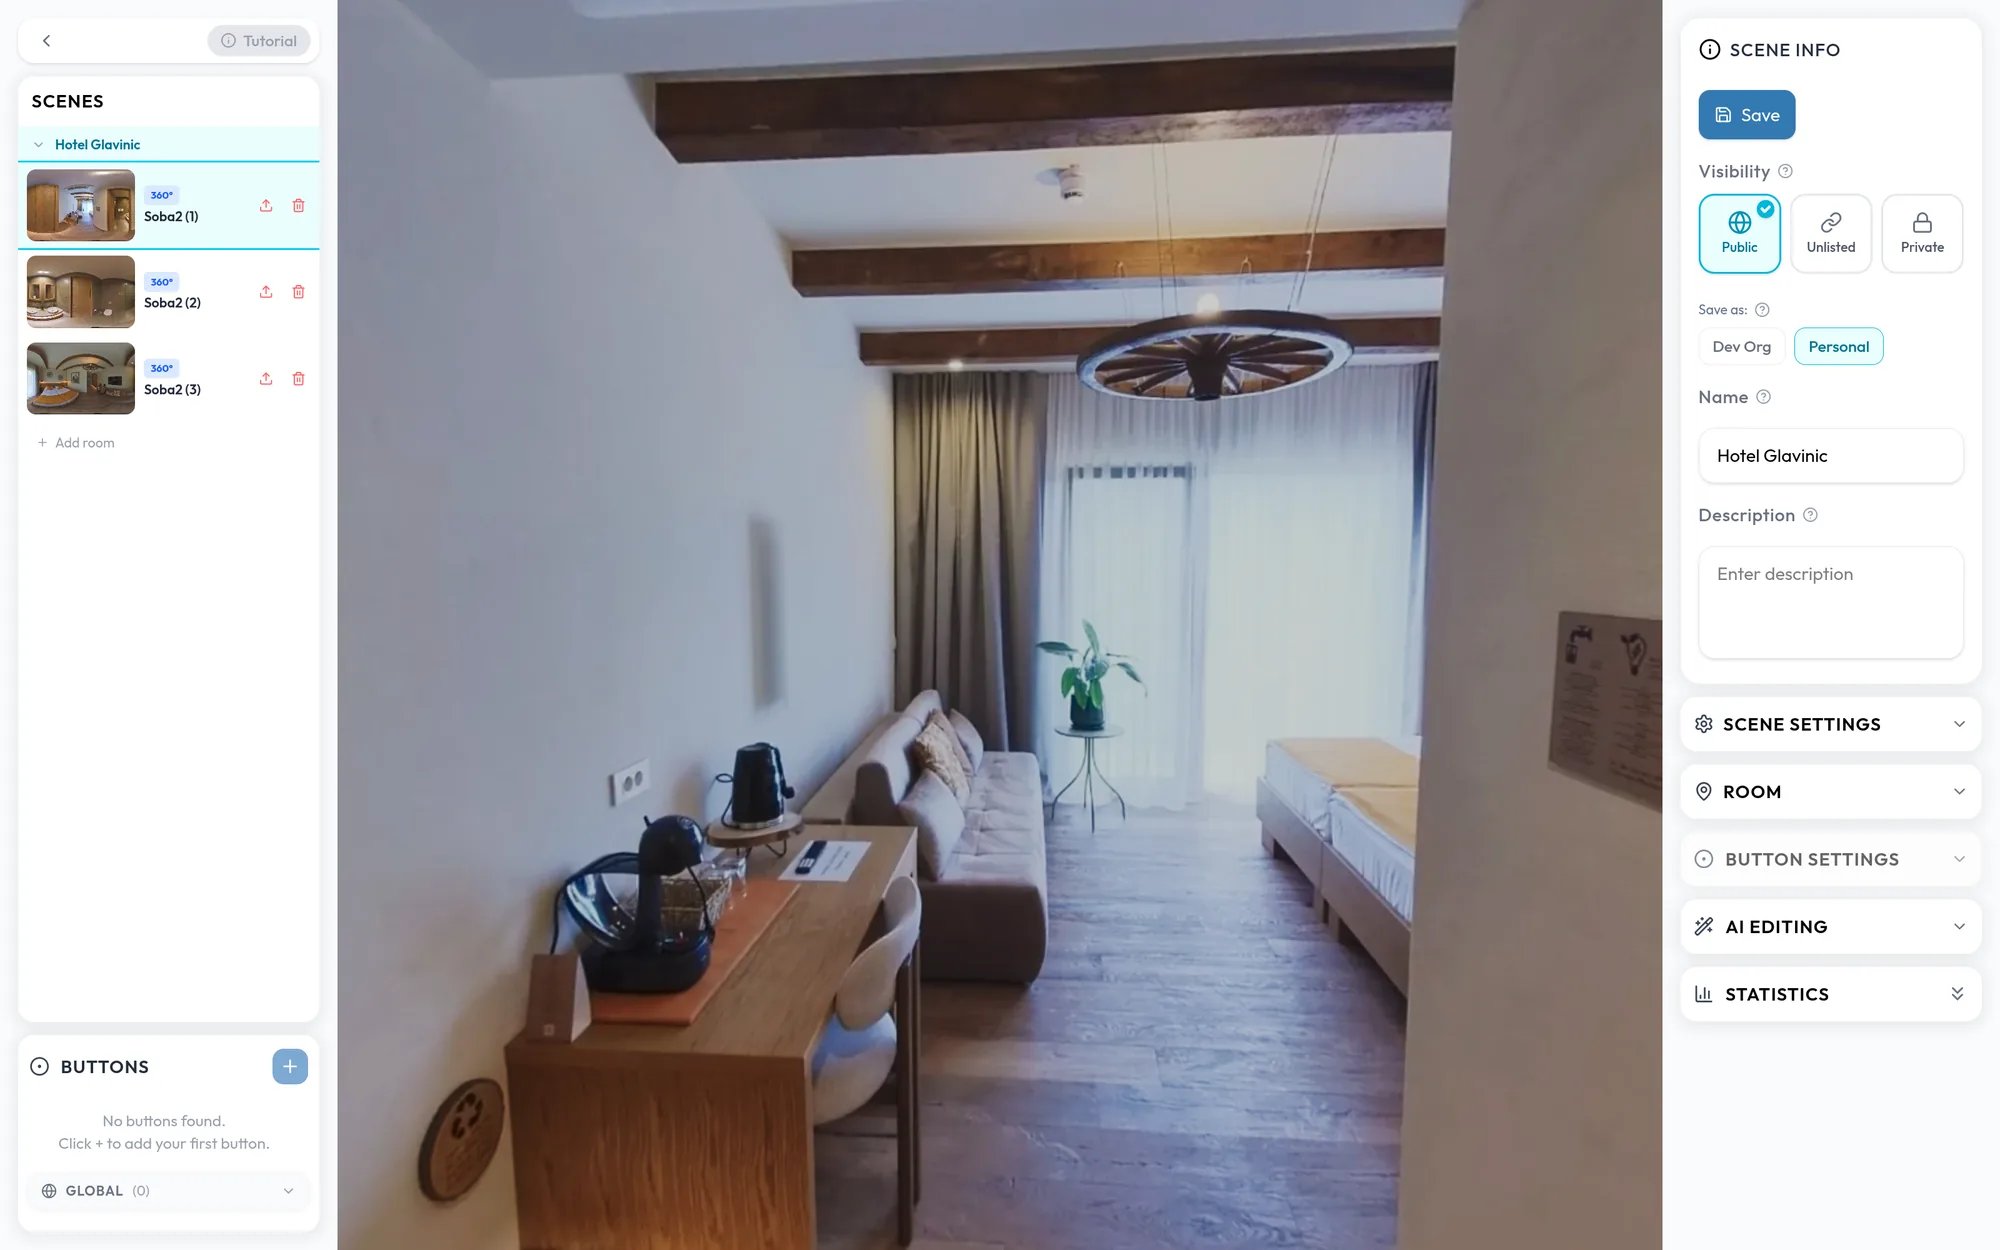
The Virtual Walkthrough editor turns your room photos into a tour, links the rooms with buttons, and publishes it as a link or an embed. It runs in your browser, on a phone as well as on a desktop.
The Virtual Walkthrough editor with the Scenes list on the left, a 360 room in the viewer, and Scene info on the right

Scenes and rooms

  • A room is one image, either a 360° panorama or a flat photo.
  • A scene groups rooms, such as the rooms of one apartment. Use more than one scene to keep separate spaces apart, for example a building overview and each apartment.

The layout

On a desktop the editor has three areas.
  • Left sidebar. The Scenes list and the Buttons panel.
  • Viewer. The live view of the selected room. Before you add anything, it is a drop zone that says Drag & drop a 360° or flat image.
  • Right sidebar. Scene info with the name, description, visibility, and Publish button, followed by the settings for the walkthrough and the selected room.
The pages in this section cover each part:

Capturing photos

Add 360° and flat photos, including from a 360° camera.

Building a tour

Connect rooms and scenes with buttons.

Room settings

Camera behavior, default view, and color adjustments.

AI room editing

Furnish, renovate, or clean up a room image.

On a phone
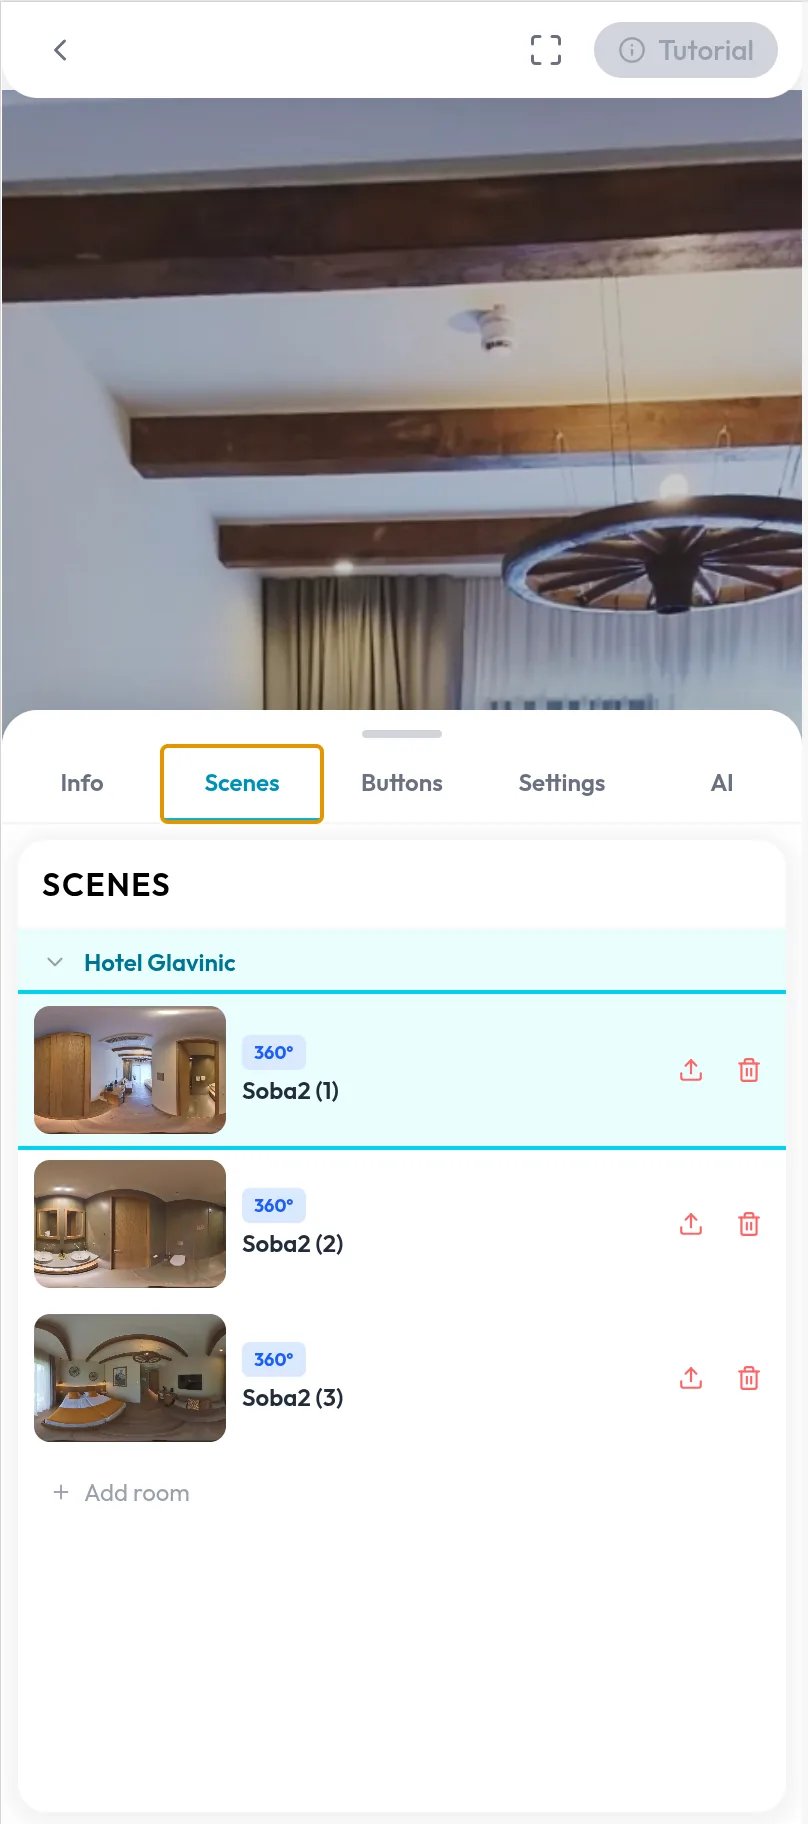
The walkthrough editor on a phone screen with a 360 room above and the bottom sheet open, showing the Info, Scenes, Buttons, Settings, and AI tabs
The whole flow works on a phone. The panels move into a bottom sheet with tabs: Info, Scenes, Buttons, Settings, and AI. The Buttons and Settings tabs appear when the selected scene supports them. Tap a tab to open the sheet, and tap the handle or the viewer to close it. This suits shooting on site and publishing before you leave. You can capture 360° photos of a property, then assemble and publish the tour from your phone on the way home.