
Before you start
- Select a room with an image. The AI Editing panel in the right sidebar, or the AI tab on a phone, stays dimmed until you do.
- Each edit uses AI tokens. The bar at the bottom of the panel shows the cost per usage and the tokens you have left.
Make an edit
1
Select the area
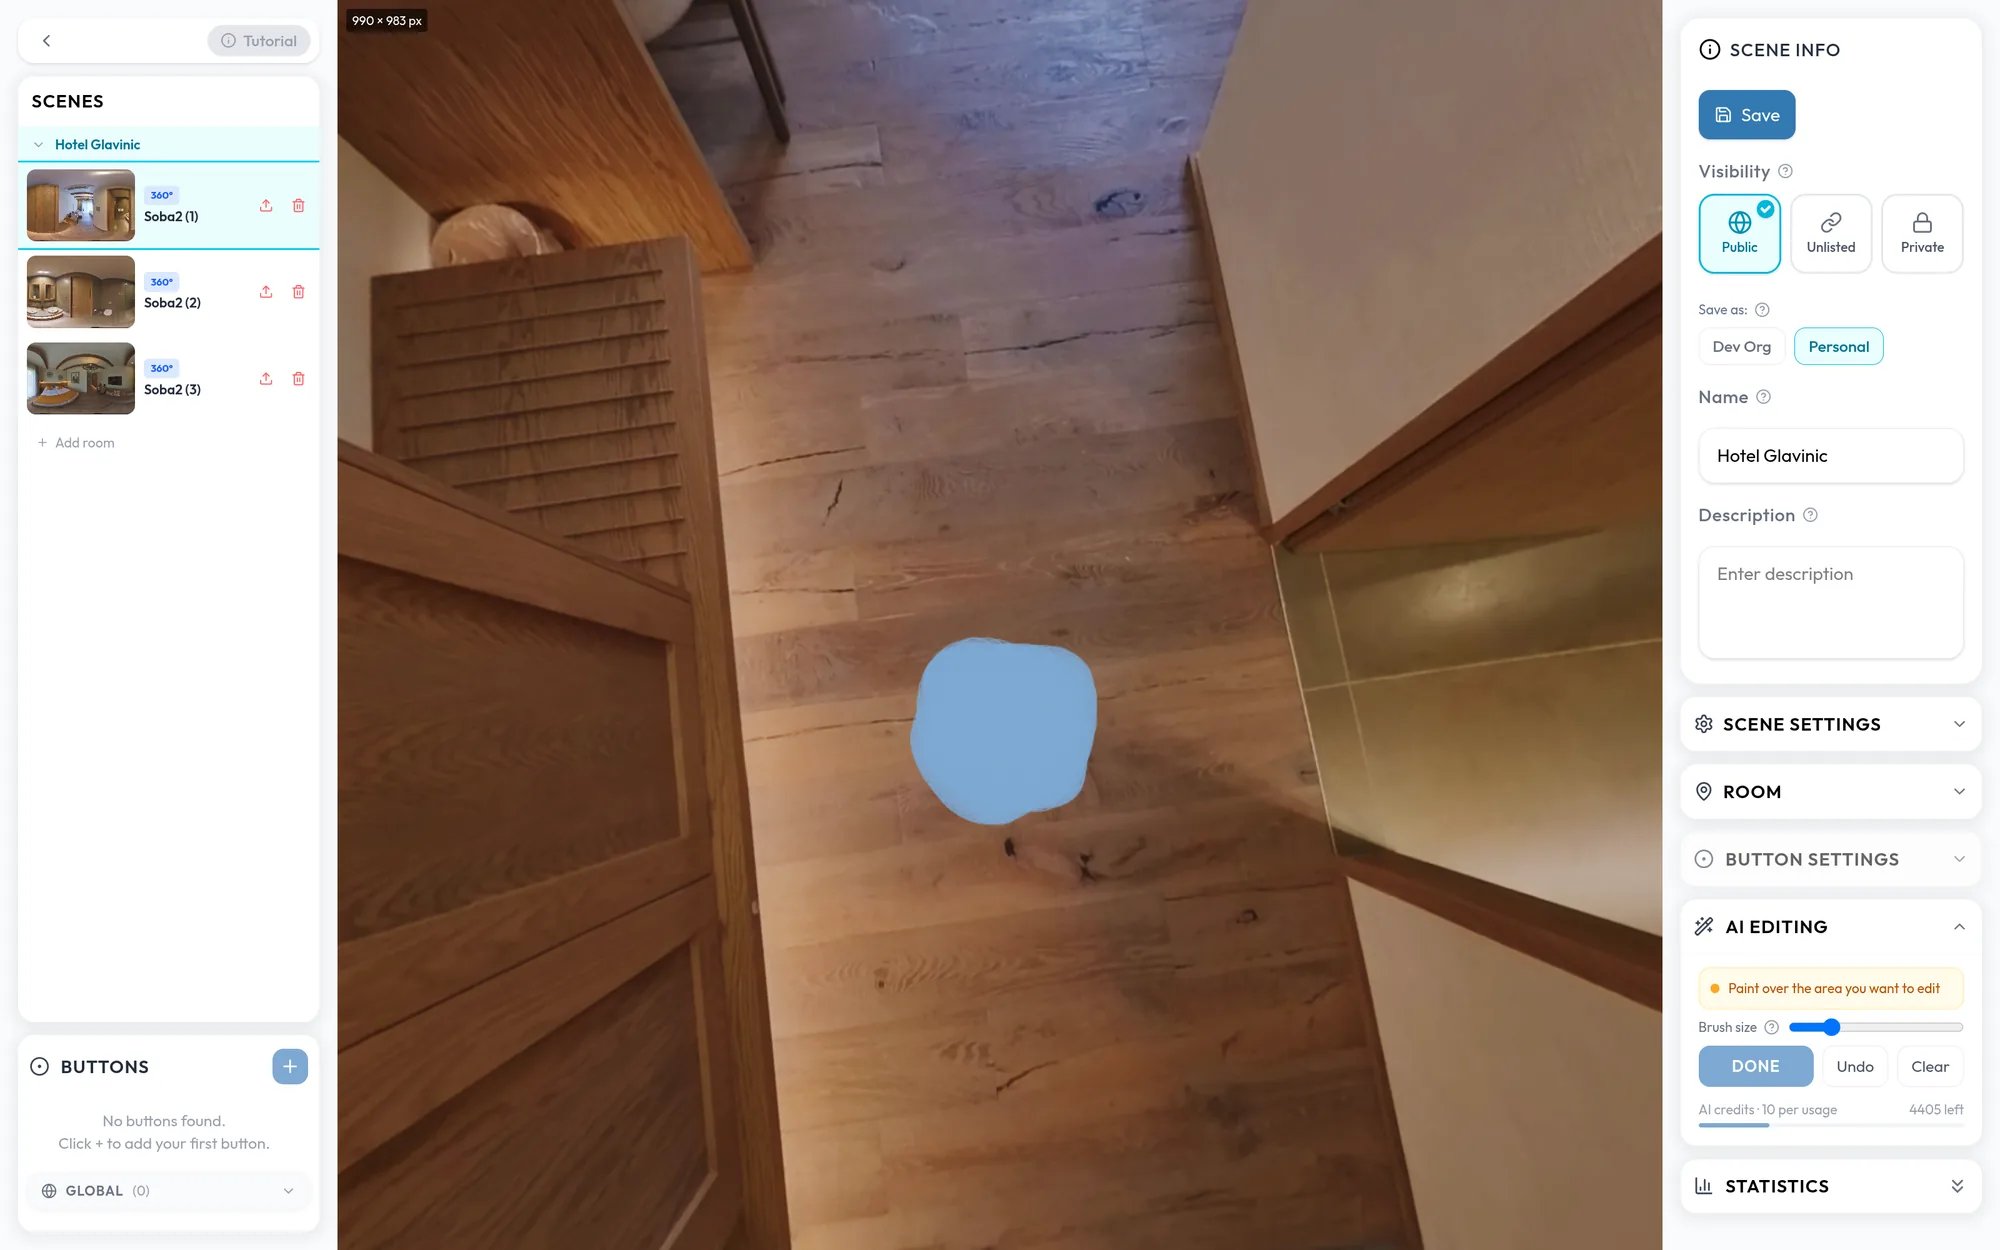
Click Select Area and paint over the part of the room you want to change. Adjust Brush size as needed, then click Done.
2
Describe the change
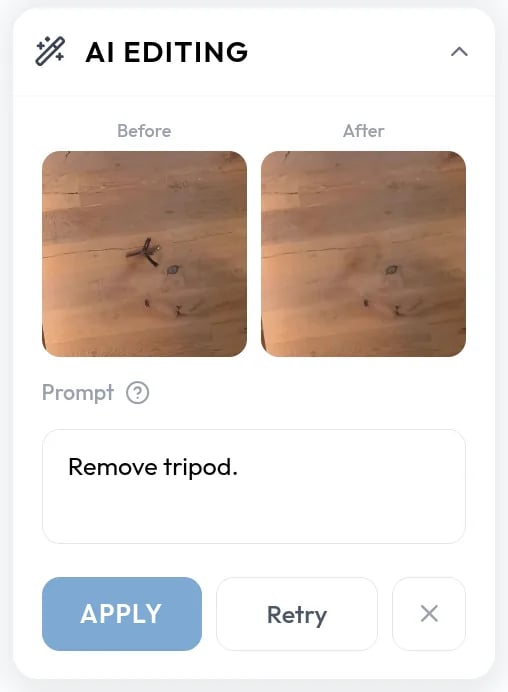
In the Prompt box, describe the change for the painted area only, then click Generate. For example: “a modern grey sofa and a wooden coffee table”, “light oak flooring”, or “remove the tripod”.
3
Review
4
Apply
Click Apply. Studio blends the result into the room photo at full resolution. Revert last edit undoes the last apply.
Edits are saved when you save or publish the walkthrough. Reloading the editor before that discards them. For a 360° room loaded from an existing walkthrough, Revert last edit does not change what you see within the session.
AI output is watermarked on the free plan. The watermark is applied when the image is shown, so it disappears from your results when you move to a plan without one.